If you’re looking to create a website, WordPress is a great option.
However, before you can start building your website, you need to host it.
Hosting your website on WordPress requires some technical knowledge but it’s not as difficult as you might think.
In this comprehensive guide, we will take you through the process of hosting your WordPress website.
We will cover everything from choosing the right hosting provider to installing WordPress and customizing your website.
By the end of this article, you will have a fully functioning website that is hosted on WordPress.
Choose the Right Hosting Provider
Choosing the right hosting provider for your WordPress website is crucial to ensure that it performs optimally. There are several types of hosting providers available, each with its own set of advantages and disadvantages. Here’s an overview:
| Type of Hosting Provider | Pros | Cons |
|---|---|---|
| Shared Hosting | – Affordable – Easy to set up |
– Poor performance due to sharing server resources with other websites – Limited control over server settings |
| VPS Hosting | – Affordable – More control over server settings – Dedicated resources for your website |
– Requires technical expertise to set up and maintain – Limited scalability |
| Dedicated Hosting | – Full control over server settings – Exceptional performance and security |
– Expensive – Requires technical expertise to set up and maintain |
| Cloud Hosting | – High scalability and flexibility – Pay-as-you-go pricing |
– Requires technical expertise to set up and maintain – Can be expensive for intensive usage |
When choosing a hosting provider, consider the size and purpose of your website, as well as your budget and technical expertise. For small to medium-sized websites, shared hosting or VPS hosting can provide an affordable and effective solution. For larger websites, dedicated hosting or cloud hosting may be more suitable.
Choose the Right Hosting Provider
When choosing a hosting provider:
- Research different providers and compare their features and pricing
- Check their uptime guarantee and customer support availability
- Consider their security measures and backup options
- Read reviews from other users
By taking the time to choose the right hosting provider, you can ensure that your WordPress website is fast, secure, and reliable.
Set Up a Domain Name
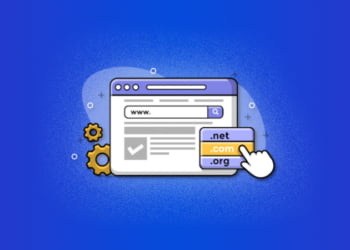
Before you can launch your WordPress website, you need to choose and set up a domain name. Your domain name is the address that people will use to access your website, so it’s important to choose one that is both memorable and relevant to your brand.
To choose a domain name, think about your brand and what you want people to associate with it. Your domain name should be short, easy to spell, and easy to remember. Avoid using numbers and hyphens, as these can make your domain name harder to remember.
Once you have chosen your domain name, you will need to register it with a domain registrar. There are many different domain registrars to choose from, so be sure to do your research and choose one that is reliable and affordable.
| Step | Action |
|---|---|
| 1 | Search for available domain names using a domain registrar website |
| 2 | Choose a domain name, keeping in mind your brand and its relevance to your website |
| 3 | Register your chosen domain name with a domain registrar |
After you have registered your domain name, you will need to set up your domain’s DNS (Domain Name System) settings. This will connect your domain name to your web hosting provider’s server.
Set Up a Server
Once you’ve chosen a hosting provider, you’ll need to set up a server for your WordPress website. A server is a computer that stores your website files and delivers them to visitors when they access your site.
There are a few different options for setting up a server:
| Option | Pros | Cons |
|---|---|---|
| Shared Hosting | Low cost, easy to set up | Less control over server resources, limited scalability |
| VPS Hosting | Greater control over server resources, scalable | Higher cost, more technical knowledge required for setup |
| Dedicated Hosting | Complete control over server resources | High cost, more technical knowledge required for setup |
| Cloud Hosting | Flexible, scalable, pay-per-use pricing | More technical knowledge required for setup |
Depending on your budget and technical expertise, you may choose one of these options over the others. Once you have your server set up, you’ll need to connect to it using a protocol called FTP (File Transfer Protocol).
Install WordPress
Once you have set up your server, it’s time to install WordPress. There are two methods you can use: one-click installers or manual installation.
One-click Installers
One-click installers are the easiest and quickest way to install WordPress. Most hosting providers offer one-click installers for WordPress. To install WordPress using this method, follow these steps:
| Step | Action |
|---|---|
| Step 1 | Log in to your hosting account. |
| Step 2 | Go to the control panel and look for the one-click installer. |
| Step 3 | Select WordPress from the list of available applications. |
| Step 4 | Enter your website details such as site name, username, and password. |
| Step 5 | Click on the install button. |
After the installation is complete, you can log in to your WordPress dashboard using the username and password you created in step 4.
Manual Installation
If your hosting provider does not offer a one-click installer, you can install WordPress manually. This process can be a bit more complicated but is still fairly simple. Follow these steps:
- Download the latest version of WordPress from the official website.
- Upload the WordPress files to your server using FTP.
- Create a MySQL database and user for your WordPress installation.
- Edit the wp-config.php file with your database details.
- Run the WordPress installation script.
After the installation is complete, you can log in to your WordPress dashboard using the username and password you created during the installation process.
Configure WordPress Settings
After installing WordPress, it’s important to configure the settings to ensure your website operates smoothly. Here’s what you need to do:
Permalinks
Permalinks are important for Search Engine Optimization (SEO). To configure permalinks:
- Login to your WordPress dashboard.
- Select “Settings,” and then “Permalinks.”
- Choose your preferred permalink structure, or create a custom structure.
- Click “Save Changes.”
Security Settings
WordPress is a target for hackers, so it’s crucial to take measures to enhance your website’s security. Here are some tips:
- Enable WordPress updates to ensure you have the latest security patches and bug fixes.
- Install a security plugin, like Wordfence or iThemes Security.
- Choose a strong password for your website.
- Limit login attempts to prevent brute force attacks.
- Ensure your website has an SSL certificate to encrypt sensitive information.
By following these steps, your WordPress website will be configured to operate optimally. In the next section, we’ll discuss how to choose and install WordPress themes and plugins.
Choose and Install Themes and Plugins
Once you have set up your WordPress website and configured the settings, it’s time to choose a theme and install plugins to enhance your website’s functionality. Here’s how:
Choose a WordPress Theme
A WordPress theme is a collection of templates and stylesheets that determine the appearance and layout of your website. Choosing the right theme is important because it affects the user experience and the overall look and feel of your website.
There are thousands of free and premium WordPress themes available. To choose a theme, consider the purpose of your website and look for a theme that matches it. Make sure the theme is well-coded and responsive for all devices. You can also read reviews and check the ratings to ensure you choose a high-quality theme.
Install a WordPress Theme
Once you have chosen a theme, you can install it by following these steps:
- Go to the WordPress dashboard and click on “Appearance” in the left-hand menu.
- Click on “Themes” and then on “Add New”.
- Search for the theme you want to install and click on “Install”.
- Once the installation is complete, click on “Activate” to apply the theme to your website.
Choose WordPress Plugins
WordPress plugins are tools that add new features and functionality to your website. There are thousands of plugins available for different purposes, such as SEO optimization, social media integration, security, and more.
To choose plugins, consider the purpose of your website and look for plugins that match it. Make sure the plugins are compatible with your theme and well-reviewed. It’s important to only install plugins from trusted sources to ensure the security of your website.
Install WordPress Plugins
Once you have chosen the plugins you want to install, you can install them by following these steps:
- Go to the WordPress dashboard and click on “Plugins” in the left-hand menu.
- Click on “Add New” and then search for the plugin you want to install.
- Click on “Install” and then on “Activate” to activate the plugin on your website.
- Configure the plugin’s settings according to your preferences.
By choosing the right theme and installing the right plugins, you can customize your WordPress website to better fit your needs and improve its functionality and user experience.
Customize Your Website
After installing and configuring WordPress, the next step is to customize your website to make it visually appealing and enhance its functionality. Here are some tips on how to customize your WordPress website:
Theme Customization
One of the easiest ways to customize your website is by changing its theme. WordPress offers thousands of free and premium themes that you can choose from. To install a new theme, go to Appearance → Themes → Add New. From there, you can browse through the themes and choose one that suits your website’s purpose.
Once you have installed a new theme, you can customize it by going to Appearance → Customize. Here, you can change the site title and tagline, upload a site logo, customize the site layout, and more.
Page Builders
If you want more control over the design of your website, you can use a page builder plugin. Page builders allow you to create custom layouts for your pages and posts using a drag-and-drop interface. Some popular page builder plugins include Elementor, Beaver Builder, and Divi Builder.
To install a page builder plugin, go to Plugins → Add New. From there, you can search for and install the plugin of your choice. Once the plugin is installed, you can start building custom layouts for your pages and posts.
Overall, customizing your WordPress website is an important step in making it stand out from the crowd. By choosing the right theme and using a page builder, you can create a website that is both attractive and functional.
FAQs
Here are some frequently asked questions about hosting a WordPress website:
What is the best hosting provider for WordPress?
There is no one-size-fits-all answer to this question. It really depends on your specific needs and budget. Some popular hosting providers for WordPress include Bluehost, SiteGround, and WP Engine. Make sure to do your research and read reviews before choosing a provider.
Do I need to have technical knowledge to host a WordPress website?
While some technical knowledge can be helpful, it is not required to host a WordPress website. Many hosting providers offer one-click installers, which make the process easy for beginners. However, it is important to have a basic understanding of servers and website management.
What is the difference between shared hosting and VPS hosting?
Shared hosting means your website is hosted on a server with other websites, while VPS hosting gives you a dedicated virtual server. VPS hosting is more expensive but offers better performance and more control over your website’s resources.
How do I install plugins on my WordPress website?
To install a plugin, simply go to your WordPress dashboard, click on “Plugins”, and then click “Add New”. From there, you can search for and install the plugin of your choice.
How do I improve the security of my WordPress website?
There are several things you can do to improve the security of your WordPress website, including using strong passwords, keeping your plugins and themes updated, installing a security plugin, and limiting login attempts.
Can I switch hosting providers after I’ve already set up my WordPress website?
Yes, it is possible to switch hosting providers after you’ve already set up your WordPress website. However, it can be a complicated process, so make sure to do your research and plan accordingly.


